Showing posts with label Craftyduckdoodah. Show all posts

Saturday, 10 March 2018

Just a Note with Colorful Seasons

Hello, hopefully this post will finally make it into print; I originally forgot to take photos and had given this set as a little thank you gift. Luckily the recipient brought the set into work enabling me to get a couple of photos, so a huge thank you Danusia.
I then went to add the final photo...
...and lost all of the text. C'est la vie! 

Those of you who take the time to read my blog will know I have a penchant for 3"x3" cards and boxes to keep them in. They really do make lovely little gifts for people. For this set I used the 2016 - 2018 In Colours.


My design was inspired by note size cards I'd made at a Coffee and Cards session with Susan aka Craftyduckydoodah. using Colourful Seasons. This set is fabu;ous as it really does do what it says on the box and cover each season. If you can only get one stamp set, this is the one and if you buy it as a bundle with the corresponding dies you makine a saving of 10%.We all love a bargain.


 I just thought that with some tweaking here and there the design would fit perfectly onto a small square card base.


I used a white card base and matted and layered in both my chosen colour, Whisper White and vellum. I cut the Whisper White and vellum using the largest square from the Stitched Shape framelits. I stamped the leaf and outline onto the vellum which gives a slightly softer look as well as Whisper White which was die cut. The skeleton leaf was die cut from Dazzling Diamonds Glimmer paper. I chose to stamp my sentiment directly onto the Whisper White. The vellum was attached to the card beneath the arrangement of leaves so the adhesive didn't show through. Loops of silver thread were secured behind too.


The pizza style box was based on my previous box, though the sides were stuck down slightly differently. As ever, I worked it out as I went along so have no instructions, sorry. For the decoration I added more leaves and finished it with a small bow.


Thursday, 31 August 2017

Coffee and Cards - Dragonfly Dreams

A while ago I managed to get to my favourite card group for a chat, coffee, cake, oh and to create a couple of cards in the process. I find the whole event quite relaxing as I don't have to think about the design; that isn't to say I follow slavishly. I don't, sometimes developing my own take and not completing them until I get home. The smaller of the cards showcased here is a point in case. We used the gorgeous Dragonfly Dreams for both cards.


For the first card we stamped and coloured 2 of the bees before fussy cutting them out. Those that are eagle eyed will have noticed that there is a bee die to correspond with the stamp, however, it doesn't just cut around the edge which we wanted for this design.

Now although I loved the little bees, I decided that I wanted transparent wings. I chose not to attach them to the card until I had adapted them. Once home, I stamped the bees onto vellum.. I fussy cut them out and used Wink of Stella on the wings for a touch of shimmer. I then cut the wings off the originals before mounting onto the vellum for a slightly more delicate effect. You can see the difference it makes here.

I also chose to mount my embossed card at a 45° angle for interest as well. In fact even my sentiment was positioned in a different place! Good job I didn't completely alter the second card...


For the second card we created a similar design but stepped up. This time we used the dragonfly, coloured with the water colour pencils and blending pen. I'm not sure why I don't use the pencils that often; they blend beautifully as you can see in the picture below. Again I used a Wink Of Stella on the wings, sorry it doesn't show up too well in the photo.


You may have noticed I used Washi Tape; it certainly gave Susan a bit of a surprise. I even tore it too. I actually liked the effect on this card even though I'm not known for my love washi tape or grungy effects. My only concession was that I chose to use the same design above and below the narrow tape rather than three different ones.

The finished cards


Saturday, 19 August 2017

Ahoy there...I saw Three Ships

Hello again, thanks for stopping by. Well it was more like little sailing boats! Once again I'd gone to Coffee and Cards, mainly because I wasn't at all smitten with this stamp set when it came out and wanted to see what could be done with it.


Needless to say, I came back fully inspired and will be adding this set to my basket next time I place an order. Funnily, I already have the coordinating dies as I thought of so many ways to use them!


I made 2 cards, the first of which is a handy note cards size. For this one, I used watercolour card and created a sea and sky using Pool Party and Island Indigo. Each element of the boat was stamped on scrap card and cut out and stuck down onto the water coloured background with dimensionals. A simple sentiment and 3 rhinestones completed what is a very simple but effective card. As usual, I stamped the envelope and the inside of the card to coordinate, Most of us struggle with cards for men but I think this would be perfect.


For my 2nd card, this one slightly larger, the sea was made using first and second generation stamping with the splodges out of this versatile set. Not quite the replacement for Gorgeous Grunge - I personally don't think anything else will be - but they do work rather well. The waves have been cut from Dazzling Diamonds Glimmer Paper which adds some sparkle and picks up on the Pool Party splodges. 


I stamped 3 boats and fussy cut them out, tucking 2 behind the waves and leaving the central one on top. They were all stuck down with dimensionals to raise them slightly. The splodges are used behind the sun too.


 I thought this card looked rather calming so chose to add a sentiment for someone retiring. Normally I try to keep them fairly generic unless I'm making for a commission. And just to show great minds think alike over a second coffee afterwards, we thought with a little tweaking and a change of colour this could make a great Christmas card. Watch this space.


Saturday, 12 August 2017

A Little Wild Part 2

Hello, the other week I promised I would show the second card I made at Coffee and Cards run by Susan, Craftyduckydoodah, featuring the A Little Wild bundle. The card we made is based on the card featured in the photo on the right. However, whilst the base card was coloured, we included a layer of white as well for a lighter, brighter effect.


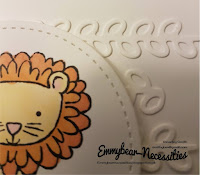
The cute little lion was stamped onto a white circle from the Stitched Shape Framelit dies and coloured with, shhhh, Promarkers.


 I'm hoping you can see the design behind the mounted circle; it isn't embossed but is one of the dies from the A Little Wild bundle, cut 5 times and stuck onto the card. I also used the Mini Sequin Trim in gold for a little sparkle. I'll let you into a little secret; instead of using one long piece of trim and hiding so much behind the circle, it's actually 2 much smaller pieces. Well it's too nice not to see!


As usual the design was stamped inside the card and also on the envelope for a fully cohesive look. It's the finishing touches that make all the difference I think.


Thursday, 10 August 2017

A Little Wild Afternoon

Hello, if you have read my blog before you'll know that I often go to a Coffee and Card session one afternoon a week that's run by Susan, aka Craftyduckydoodah. We used the new A Little Wild bundle; it's so cute. You get the front and back of the animals and the dies keep them joined so you can make up tags. Have a look to see what I mean. Of course if you want to separate them as we did a quick snip with the scissors soon sorts that.


As always, we were given a choice of colours to use for the first card which featured an elephant. This card tends to be the simpler of the two, designed to ease any newcomers or non crafters in; it is very often slightly smaller, being a handy notecard size.


I chose to be different to the rest of the group and used the new DSP in Powder Pink as I thought it would make a great baby card for a girl. Isn't it sweet?

I stuck the DSP onto the card and then used one of the circle Stitched Shapes Framelits to create the aperture. With the card closed I then stuck the patterned circle that was cut out onto the inside of the card. It helps to have the card closed so you can line up the pattern and place  it in exactly the right position.

The elephant was coloured, die cut and snipped apart.  I carefully stuck the back of the body down first to make sure he was at least straight and stamped some grass underneath for grounding. The head was attached to the front If I made this type of card again in landscape style, I would have the fold at the side. There is a reason for this, as the back of the elephant looks upside down when you open the card. I like to think he was so excited that he was caught mid cartwheel!

When I got home I had an idea of how to step up the card just a little bit. It's pretty as it is but I just wanted to add a little more to it. So, I decided that maybe the elephant could hold a couple of balloons on a string. I also added a generic sentiment so this could be for a little girl's birthday or a new baby card. Which do you prefer?

I added clear Wink of Stella to the raised balloon for added sparkle after the photo had been taken.

I did make a second project, using the lion which will be featured in another blog post at a later date.


Wednesday, 7 September 2016

Cards and Coffee.... and a card or two

It's always nice to meet up with like minded people and spend a couple of hours eating cake, drinking coffee and of course, creating something beautiful. Yesterday I went to a Coffee and Card session hosted by Susan at the Grand Piano in Godmanchester. I highly recommend Susan's groups; lot's of chat and fun is had by all and she takes time to demonstrate new to us techniques whilst giving plenty of encouragement. I have to confess that yesterday I just couldn't get my eyes working well enough for the 2 stage stamping so ended up using some items already stamped. I've ordered the set used and know with practice I'll get the hang of it quite quickly.

Susan's design, Gorgeous isn't it?

The great thing about crafting with others is that we all have slightly different ideas on the theme and while it's accepted to copy - CASE - a project Susan has created for us, we're also encouraged to go "off piste" and run with our own ideas. The inspiration for this card was Jar of Love. We also used a Swirly Scribbles Thinlit die for the wreath. No two cards were exactly the same, I even chose to use slightly different colours on mine and also liked the idea of putting the sentiment onto a banner as you can see.

...and my version


I'm really looking forward to the next session, can't wait to see what we'll be creating next. If you'd like to create a card like this, pop along to Susan's blog for a list of items used.