Wednesday 29 March 2017

A Little Piece of DSP Goes a Long Way!

Hello again, the other day I posted my first One Sheet Wonder. It got me thinking about using designer series paper more in my cards, particularly when I have just a small piece left that I can't bear to throw away!

This card only needed a piece of patterned paper approximately 1"x2". How cool is that? It goes to show that no matter how small, in crafting we can always find a use for it.


I used two of the Stitched Shapes Framelit dies to matt and layer 2 squares using the DSP. Then I stamped my sentiment onto Very Vanilla and put the same plain matt behind that. As you can see, extra interest was created by embossing the background. And sometimes, there really is a case for adding a little sparkle, this time a few sequins.


Monday 27 March 2017

One Sheet Wonder

Hello again, I don't know about you but I keep seeing some fabulous cards created from one sheet of DSP. It can be an easy way of making a bunch of cards quickly. I'd been thinking about trying this idea out but hadn't got round to it. The idea of making a wrong cut on a precious sheet of 12"x12" DSP was too much to contemplate. Then I stumbled across this one, making four cards by using a 6"x6" sheet on Pinterest so thank you to Sylvia for sharing. Click on her name and it should take you to the blog.


I used a sheet from the Pretty Petals DSP, sadly now retired, which then dictated the plain colours I chose. I love butterflies, so the subject choice was very easy to make this time. I hate to say it but I am a creature of habit!

I also decided to stamp most of the sentiments onto the Stitched Shapes Framelit dies, they look that bit more interesting than plain shapes. I've noticed that some people haven't realised that the dies - 4 of each shape are stuck on both sided of the card in the pack. Circles and ovals on one side and squares on the other, so if you buy them please don't think you're missing some.

I tried to keep the designs pretty much on theme but with slight variations to make them more interesting. I really don't like making more than one of any design unless I actually need to.


A spot of 3 stage stamping on the butterflies...

...and a little water colouring


Even a length or two of ribbon for good measure.


For my first attempt I'm reasonably happy with these cards. I think it has given me the confidence to have a go with a 12"x12" piece of DSP which would give more variation of shapes, even reversing the paper as most of it is double sided. I've found that if you're really not sure of matching or coordinating colours, then this is a really good starting point.


Saturday 25 March 2017

Happy Mail

Hello again, the other day the postman knocked on my door and asked me to sign for a small parcel. Now that isn't unusual in this house but this time I wasn't expecting anything to arrive.


It was what I call "Happy Mail"; something sent by someone I know as a random act of kindness. It certainly maid me smile...  So what was in the parcel?


I was kindly sent the Sprinkles embellishments. I love these for adding to shaker cards. I feel so lucky, they were on my April order, now removed for something else to take the place.


It has made think though, how nice is it to receive something in the mail "just because"? I know of one or two people that randomly select someone to send a little treat to.

Although it would only be a handmade card they are made with thought, care and love. I've decided to occasionally choose someone to put a smile on their face with happy mail. So, if I have your address, you never know, one day it might be you.

Thursday 23 March 2017

One Design For Him... And For Her

Hello again, last time I promised I would take a design and show how just by changing the DSP and embellishments, you could totally change the look. I'm using the paper fold I saw on the blog of Stamp and Scrap with Frenchie again. 
So, number one card, I think you'll agree it's rather masculine. I know women can do DIY and some men don't know a spanner from a screwdriver but historically tools are for men. 


Once again I chose to use Urban Underground as my starting point. I also used the Nailed It bundle again. Keep an eye out, I have a design in mind using Nailed It in conjunction with Jar of Love.

A sneaky peek at the first card. You'll see the completed card at the bottom of the post
Not wanting to waste anything, I even found a use for the holes from the die cut nuts as you can see in the picture on the far right. The spanner was cut from Smoky Slate with a liberal coating of clear Wink of Stella. I think that may be one of my favourite craft items.

And now onto the second card. Goodness, I really struggled to decide on one DSP; I had two designs in mind, one using pastel shades and the other brighter colours. In the end, I plumped for the pastels. 


The DSP I used came from the Falling in Love series; the colours are so soft and delicate. I used a Lace Doily, cut in half and positioned behind the paper fold for added interest. A few sequins added just a little glitz while a water coloured and die cut butterfly finished off the look I was aiming for.


I guess after the teasers I guess you'd like to compare the cards?

Do you think they look different enough to appeal to both sexes?


Tuesday 21 March 2017

To Bee or Not to Bee...

Hello again, recently I won the gorgeous Dragonfly Dreams stamp set in a prize draw I’d been entered into. I feel so lucky, I’d been eying up this set as soon as I saw it as my daughter, Abby, loves bees!


I had also seen a quick and simple paper fold on Pinterest by Stamp and Scrap with Frenchie so thanks to Frenchie for sharing. Click on the name to go to her tutorial. Her card was quite feminine but I thought by using the Urban Underground DSP it would make a more universal card. In fact, my second card is very definitely male oriented! Check out my next blog post to see how by using a different DSP and embellishments you can alter the same design to look either ultra feminine or masculine.


I love the detail on the bee. This was created by using a two part stamp. First I stamped the yellow base after stamping off on a piece of scrap paper. Then I stamped over the top with the second stamp, using black. Once I’d found my clear Wink of Stella, I added some shimmer to the wings – sadly not shown in these photos.


Isn't the beehive cute? It's from the Shooting Star bundle


Sunday 19 March 2017

Quick Tip no 5

Hello again, a while ago I showed my quick tip for lining up and adhering card when matting and layering by using double sided tape. I've shared this with people several times, thanks to Susan, who taught me this nifty trick.

Today I'm turning my attention to intricate dies and how best to stick them down. There are several tried and tested ways that work without glue spreading everywhere. It's just a matter of trying them and deciding which method works best for you.

For the first method, take wet glue and smear a little across the back of your hand. Then take your die cut and dab it over the glue. I've found this works really well for me and luckily I haven't had a skin reaction to any of the glues I've used. Once dried the glue will peel off your hand.

For the second method put a little wet glue on a piece of acetate or silicon. Then take a small piece of sponge and soak it in the glue. Once damp, the sponge can be dabbed on the back of the die cut. The sponge can be kept in a small ziplock bag for future use. One advantage is that you don't waste glue, it's also always to hand.

And finally, the third suggestion is to use a Fine Tip Glue Pen. Just be careful and remember not to squeeze too hard. This product leaves a very fine line for precision gluing.


Friday 17 March 2017

Just Sitting Here...

Hello again, earlier this week Nikki from Friends For Life Grooming Parlour came to cut Fiz's nails, She had kindly agreed to take some of my cards to display and we got to chatting about the type of card she thought would be suitable. Did you know how difficult it is to find a card to express sorrow for the loss of a pet? For those of us with pets, they really do become one of the family. It got me thinking,..
                                              ...and designing!

Luckily I have the Sitting Here stamp set; perfect for a reflective card. I teamed it up with Awesomely Artistic and am really pleased with the result.


This was the second  time I'd used the SU Watercolour Pencils, they are a dream to use with either the Aqua Painters or, in this case, the Blender Pens. I also had to mask off parts of the design too. When masking, remember to start with the image in the foreground first and work backwards.


A close-up of the design


Wednesday 15 March 2017

What Tempts You...Part 2

Hello again, in a previous post I talked about the tools and equipment that are needed or in some cases, handy to have for heat embossing. Today it's the turn of ...

Stamping

Now I know this might seem a bit obvious but trust me, there are some gadgets out there to make life a little easier. So, what does the new stamper need?

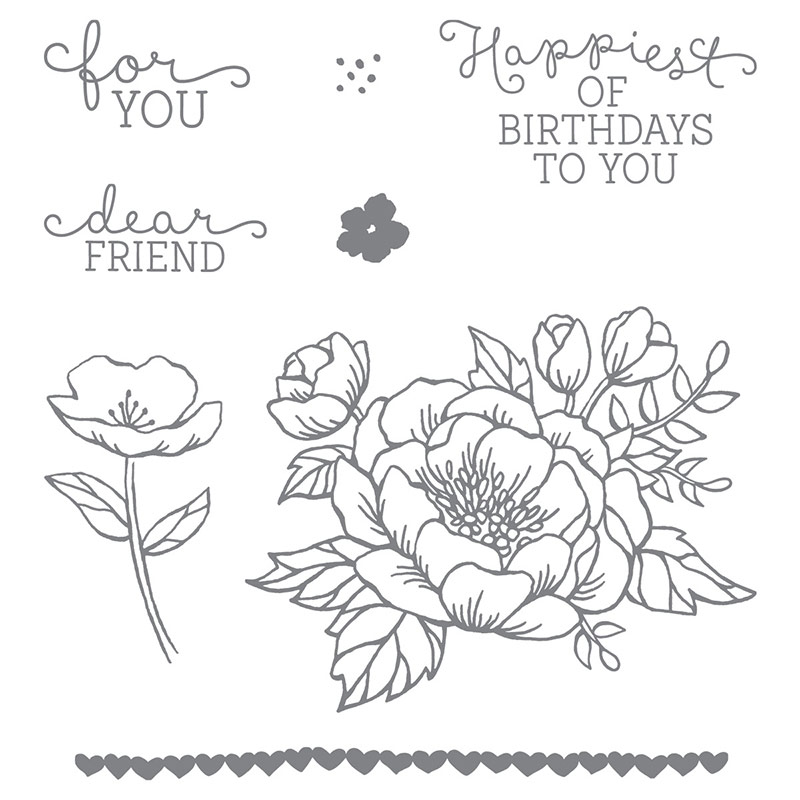
Stamps - of course. There are different types though. Photopolymer are totally transparent for perfect image placement, so you can do 2 and 3 stage stamping. They are also flexible, giving more creative possibilities with each set. Clear-mount stamps are made of rubber and are repositional. For both photopolymer and clear-mount stamps you will need a set of blocks. Wood-mount stamps are made of the same rubber as clear-mount but are, as the name suggests, mounted onto a wooden block. There are advantages and disadvantages to all, it really is a question of personal taste. Some things to consider though are storage, clear-mount and photopolymer take up less space, naturally. The wood block can get ink stained if you are a little heavy handed. However, with wood-mounted, you are ready to stamp straight away, you don't need to buy extra blocks.


Blocks - If you have photopolymer or clear-mount stamps you'll need clear blocks to mount them on. They are made of acrylic and have a groove around the side for easy gripping and come in various sizes. 


Inkpads - a subject in itself. I have already posted about the different types of inkpads and their uses. Please click HERE to go to the link.

Cardstock/Paper - There is a wealth of paper and cardstock on the market. If you plan to watercolour then Shimmery White card or Watercolour Paper will take the water without pilling.


Stamp-a-ma-jig - Such a useful gadget for ensuring your stamping is placed exactly where you want it. The Stamp-a-ma-jig comes with full instructions for use.


Precision press - again this ensures perfect placement of your stamps. It's perfect for layered stamping and multiple stamp runs when you are creating an amount of the same card, for example, wedding invitations. Also, if your image doesn't quite stamp fully, reink it and stamp again! Since I bought one my stamping has definitely improved.

Stamp cleaner - oops, I nearly forgot that one. If you use Stazon ink then baby wipes or water just don't cut it. You'll need to get Stazon Cleaner to clean and condition your stamps. I confess that when I use other inks, I do use either a gentle wash liquid and water or a baby wipe and have no ill effects so far. Photopolymer stamps do tend to stain but it doesn't affect their use.

Monday 13 March 2017

It's Been a While...

Hello again, I've talked before about finding Stampin' Up because I went to a Coffee and Cards group in my nearest local town. Well, due to recent work commitments I haven't been able to join everyone recently.

Luckily I was available to go last Tuesday. It's being held in a new venue and I'm so pleased the lighting is better. It was lovely to see some familiar faces and catch up with the news as well as meet what I hope will become new friends.

Susan had been asked if she could design some cards that were suitable for men; they never seem to be an easy subject to cater for but the new bundle Nailed It fits the bill perfectly. We made a smaller notecard size one as well as the usual A6.

I love the nail die, the ruler is embossed!

So often men's cards are very dull colourwise so it made a refreshing change to use Delightful Dijon from the In Colours 2015 - 2017. This colour will be retiring at the end of May so if you haven't got it yet and want it, don't delay. It certainly went into my shopping basket this week; I have all of the ink pads in the colour families but so far have only got the In Colours I know I'll use alot.


The first card we made was suitable for a novice to undertake. Both Louise and I decided to go a little off piste with the Father's Day stamp which meant slightly altering the placement of the screwdriver. Once home I also decided to stamp the grey background card to add more interest. I love that we all start with the same basic premise and adapt it to suit our requirements.

The second card used Gorgeous Grunge to enhance the background. It was a stamp set I had passed by several times but once bought,  it makes an appearance in so many cards I make. This time, we used the Hexagons Dynamic Textured Impressions Embossing Folder. It gives amazing depth to any project it's used on. At the moment if you buy the stamp set and coordinating dies as a bundle you can save 10% on the retail price.


Saturday 11 March 2017

What Tempts You... Part 1

Hello again, I recently wrote about basic equipment and tools a new crafter would need in their starter kit. This time I thought I'd suggest some useful things depending on your particular area of interest as you continue your crafting journey. Originally I was planning to write one post but having started, I think it would be better to spread this tutorial over 3 separate posts. So, today we kick off with -
.
Heat embossing

For an easy to follow tutorial click here if you're a novice or just want to improve your embossing technique.


Anti-static bag - Rub the Embossing Buddy across your paper or card stock before stamping and embossing to remove static, fingerprints, smudges, smears and stray embossing powder. It really does work!


Heat gun - Please don't think your hairdryer will work - it won't! If you want to heat emboss you'll need a Heat Gun to melt the embossing powder.


Versamark ink pad - a slower drying, clear ink that allows time to sprinkle embossing powder onto your project. If you prefer to use a coloured ink, use a pigment based inkpad for stamping.

Stamps - once you start buying stamp sets you'll find it will become a mini obsession! I certainly do, The type of stamps you choose is down to personal choice. There are photopolymer, ideal for 2 and 3 step stamping, clear that are mounted onto clear blocks when you want to use them and wood mounted. Each has it's merits so experiment to find what you like to use.

Paintbrush - I find a fine paintbrush invaluable for removing stray embossing powder before I heat set it.

Embossing powder - again, there are different types on the market; glitter, matte, pearlescent and many, many colours... This once again is down to personal choice. I would recommend, however, starting off with clear (needed for some techniques), gold, silver and black. 


Thursday 9 March 2017

Happiest of birthdays

Hello again, todays offering is an understated floral design using Birthday Blooms. I had seen a tutorial on You Tube where a smaller piece of card was placed on top of the larger base card and then stamped. Sadly I can't remember whose video it was or what the completed design looked like. This is my take on that technique though so apologies if someone feels I should have acknowledged their work.


I found using my precision press invaluable for the task of stamping as it meant I could re stamp the base card - I'd used thick Whisper White so I could watercolour without my cardstock pilling, which meant the base card didn't stamp so well with the top card on.


close up


I have a confession, I used to be a little bit bothered about the idea of  watercolouring; I mean, trying to get light and shade in the right places seems so confusing....


...now I just try to make sure I use more depth of colour where there are more lines. Of course the other trick is to shade on the opposite side to where the light shines from. Although with flowers, I sometimes prefer to make the outer petals lighter.


I still haven't made up my mind whether to add a few gems to this so I'm leaving it as it is for a while and will look again later on with a fresh perspective. For now this is the finished product.


Tuesday 7 March 2017

Flowering Flourishes.

Hello again, apart from sentiments, if there is one type of stamp set I would recommend every stamper to have in their stash it's a set of flourishes. They are so versatile, from adding background interest to becoming the main focus.

Today I've shown how one flourish taken from Flowering Flourishes can be used to different effects. Sadly this set has now been discontinued.


Simple yet elegant
First of all I stamped the flourish multiple times acoss the card to create a striking background, It was mounted onto a slightly larger piece the same colour as the stamping to create a border. A band of ribbon with sentiment was added to complete this simple, elegant card before attaching to the base card
.


Mounting each layer onto matching cardstock
For the second card, I used a precision stamping press to ensure my image was stamped in exactly the right place for each layer. And for the eagle eyed, yes it has been placed slightly to the right. I am considering putting a dragonfly in the top left hand corner. As usual I've stamped inside the card and also on the envelope.


And finally for a more dramatic look I heat set gold embossing powder onto Cherry Cobbler. Although this would be a perfect card for an  anniversary card I've used a generic sentiment so that it's suitable for more occasions.


Sunday 5 March 2017

Quick Tip no 4

Hello again. today I haven't so much a tip but more of a tutorial. Anyone new to stamping will be so confused by the array of ink pads on the market. It really is a minefield, each having their own specific job to do. Use the wrong type and your results will be less than perfect. So, what do Stampin Up have and what are their uses.

Black Stazon - this permanent ink is solvent based and is designed for stamping on non-porous and semi-porous surfaces such as glass, metal, acetate and leather. It dries very quickly so always replace the lid promptly when not in use. It's ideal to use for outlining and you can use Stazon with Stampin Up Classic Ink and Aquamarkers to watercolour without fear of the Stazon smudging into the colours used. Stamps need to be cleaned with a solvent based cleaner when using Stazon. Just a note of caution, Stazon can react to photopolymer stamps, so clean thoroughly after use.


Black Memento - this is a water based dye ink. If you are using it as an outline you will need to use alcohol based pens so that the Memento doesn't bleed into the colours.


Stampin Up Classic Ink Pads - again these are water based dye inks. Basic Black however is waterproof. Classic inks can be used on most porous types of paper, however when watercolouring with Aquapainters or Blender pens, Shimmer paper or Watercolour Card won't pill when wet. They can take an age to dry - if at all - on glossy, coated and non-porous surfaces. As it is very quick drying, Classic Ink pads aren't suitable for heat embossing. Stamps are easily cleaned with baby wipes.


Versamark - is waterbased and transluscent. It's ideal for stamping an image that is going to be heat embossed as it is slow drying. Versamark can also be used for resist stamping and watermaking or tone on tone effects. Again, stamps can be cleaned with a baby wipe.


I think the main thing to remember when colouring in is that opposites work best. So, if you want to watercolour then stamp the outline with a solvent based ink or conversely, if you use alcohol markers then use a water based ink pad.

Friday 3 March 2017

Lovely As a Tree

Hello again, you know I'm so lucky to live in Cambridgeshire; it's a beautiful part of the country even though the landscape is so flat! You can see for miles...

The other day, instead of my usual trek into work, as it was half term I travelled to Cambridge on the guided bus to meet my friend, Chantelle, for a day of shopping, eating cake and drinking tea. It's a journey I used to make on a daily basis when I worked in Cambridge but I don't often travel there now so I really enjoyed looking out of the window at the scenery. Sadly I didn't get chance to take a photo.  Watching the sun coming up over the lakes at Fen Drayton really inspired me to use Lovely as a Tree. I had an inkling of an idea on the bus and made a scribbled drawing to remind myself.


OK so the photo isn't mine but I have tried to find contact details for Jme and also included his blog details. I just thought the addition of a photo would give an indication of the view.


I love blending inks, it's so theraputic; the more time you take, the better it looks as the colours build up. You just have to make sure you aren't going out for a special event though as fingers get very inky!

If you try it and aren't too sure of the result, keep going as it will improve. This time I used a die cut Post It note to mask a circle for the sun.

For the background layer I did the Joseph's Coat ink technique, it worked so well with the colours.


Stamping inside the card and also on the envelope ensures each project has a cohesive and finished look.