Showing posts with label watercolour. Show all posts

Saturday, 3 March 2018

Flying Home

Hello, as soon as I saw the Flying Home stamp set I knew it would soon be winging it's way to me. It's taken a little while to get round to inking it up but I just love the results with my first card; perfect to send to someone that has just moved into their new home. In fact I think I might already have a recipient within the next few weeks, all being well. I also thought mamma bird feeding her chicks in the nest could make a great card to celebrate the birth of a baby!


Although my card base is Whisper White, I chose to use Soft Sky to create a border. I partially die cut a circle, completing the cutting around the nest with scissors. I love this effect; it can be a little time consuming to get it right but really is quite easy.


I used a combination of Stampin' Up watercolour pencils and ink pads in conjunction with a blender pen to spread the colour.


I used dimensionals to create a 3D effect and placed some linen thread behind the sentiment which is from the At Home with You stamp set.


Tuesday, 12 September 2017

The Joy of Sets Design Challenge 6 (Letter T) - Summer by the Sea under a Sheltering Tree

It's no secret that I adore the retired stamp set, Summer by the Sea. So far though I've only used the girl gazing into the distance; I'm sure that will soon change though.


For the Joy of Sets Challenge Blog, I chose to combine this gorgeous set with with a current one, Sheltering Tree with the sea stamp from High Tide and the dog from Sitting Here. I loved making this card.

Tuesday, 22 August 2017

Summer by the Sea at High Tide

Sometimes you just HAVE to have a stamp set you see, regardless of whether it's current or not. For me it has been Summer by the Sea, which was released oh so long ago in 2004! I first saw it on The Joy of Sets Facebook Page and was so lucky when someone offered to sell me it when I added my request to an ISO page.


 I love the delicate drawings, they almost sweep me up in a hug. I look at them and feel that no matter what, everything will work out right in the end.


I wanted to use High Tide with my chosen image as I felt they would combine well. First of all I roughly sketched my idea in my notebook. Then, to check it would fit, I plotted my card size on the squared paper and roughly stamped the design in basic black ink. It meant I could see where adjustments, if any, needed making prior to committing on good card.

Once ready I stamped the girl onto Shimmer card. Then using my precision press, I placed the first of the lighthouse stamps; this is a 2 stage stamp set. I used Dapper Denim and stamped off on scrap paper first to get a lighter version. I then used the second lighthouse stamp, using the ink at full strength, I found it easier to do this and then add the outcrop the lighthouse stands on.


I stamped my image onto a post it note, incorporating the adhesive, and cut it out to create a mask. When stamping scenes where you layer stamps, always start with the image in the foreground. If you've never attempted this all will become apparent soon.


I also created a light wash in So Saffron for the sand to help tie in the lighthouse.


Place the mask over the corresponding image. For this dexign I didn't need to cut it all out.


I then placed the dry stamp where it needed to be to check my mask would work. Once happy with the placement it was time to ink up and go for broke. I also stamped over my colourwash very lightly to continue the sandy look.


Still using the mask and also using one for the lighthouse, I stamped the water. A quick colour wash for the sky finished the background. So far, so good.

Masks were removed so that I could colour the girl. Did you know that a mix of Blushing Bride and Crumb Cake make a great Caucasian skin tone? I stamped a few tufts of grass too. Finally before mounting onto my base card, I let my image dry and then weighted it under a box of dies to flatten out.


I hope you like the finished card,


Thursday, 9 March 2017

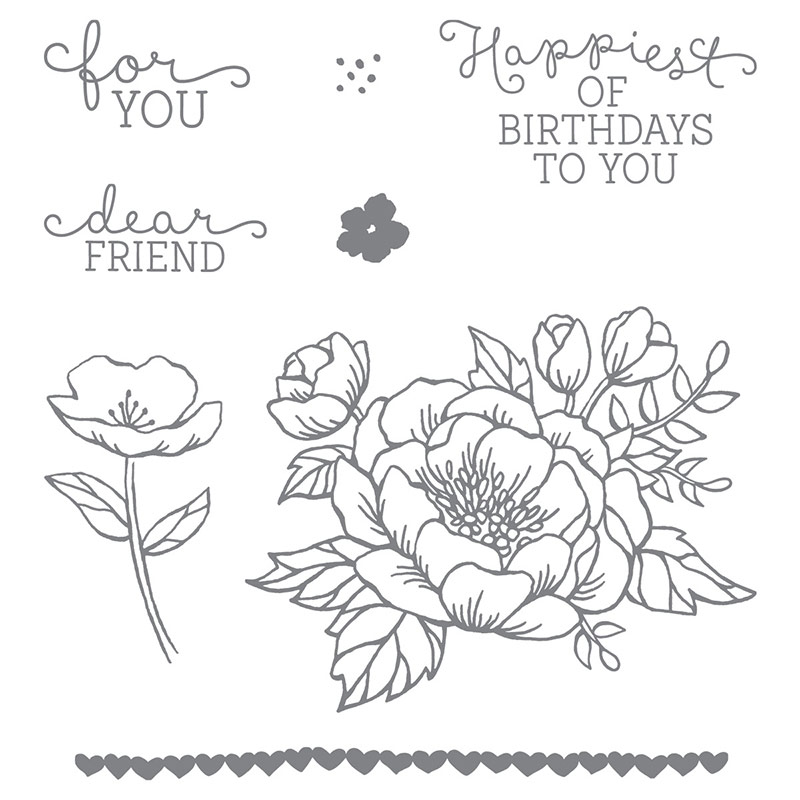
Happiest of birthdays

Hello again, todays offering is an understated floral design using Birthday Blooms. I had seen a tutorial on You Tube where a smaller piece of card was placed on top of the larger base card and then stamped. Sadly I can't remember whose video it was or what the completed design looked like. This is my take on that technique though so apologies if someone feels I should have acknowledged their work.


I found using my precision press invaluable for the task of stamping as it meant I could re stamp the base card - I'd used thick Whisper White so I could watercolour without my cardstock pilling, which meant the base card didn't stamp so well with the top card on.


close up


I have a confession, I used to be a little bit bothered about the idea of  watercolouring; I mean, trying to get light and shade in the right places seems so confusing....


...now I just try to make sure I use more depth of colour where there are more lines. Of course the other trick is to shade on the opposite side to where the light shines from. Although with flowers, I sometimes prefer to make the outer petals lighter.


I still haven't made up my mind whether to add a few gems to this so I'm leaving it as it is for a while and will look again later on with a fresh perspective. For now this is the finished product.


Friday, 23 December 2016

How many Xmas cards do I need??

Hello, thanks for stopping by. I can't believe on Christmas Eve I'm still making cards for the holiday season. I am really enjoying making them so I've started on my stash for 2017; how's that for forward planning? No getting caught off guard this next year for me.

This time I'm sharing a shaker card. Susan of Craftyduckydoodah showed me this easy way of making them at one of her Coffee and Card sessions. I've used mainly SU products although I confess the church stamp is one I've had for several years and is not made by Stampin Up. I chose Night of Navy and White with silver accents for a fresh look.


 I've used dies from several sets to create the bauble card so my shopping list might seem excessive this time. Those of you that know me, are aware I like to get value for money so this time, in my defence, I was trying to think outside the box. The bauble is actually just a round die with the top taken from the Delicate Ornament Thinlits. The bow is from Everyday Jar Thinlit dies although I could have used the bow as well as the sentiment fromWonderful Wreath Framelits. The Softly Falling embossing folder added some texture and just made the whole scene feel a little more Wintry


The band of Silver Glimmer Paper and die cut sentiment complete the look. Please look out for other cards based on the bauble theme; I intend to make a variety of them.


Monday, 5 September 2016

One set.... how many ways

At the start of this week I decided that I'd take one stamp set, in this case Balloon Celebrations along with the balloon punch and make a different card or papercraft item each day. When I first started with Stampin' Up my lovely upline Susan, also known to me as Mama Duck, said that the best way to choose a stamp set was to have at least five designs in mind to use it on. Let's face it, we all like to get value for money.


So, lets start. For my first project, I'm not using the balloons which would be the obvious choice. The stamp set has 2 tiny stamps that look a little like tiny florets that together could create a dandelion head. It has to be said that when I first saw them, I wasn't too sure how I would use them. Anyway, as usual Pinterest came to the rescue and I've taken ideas from 3 sources and combined to make my own design. I created a background using Soft Sky, Marina Mist,  Dapper Denim and a little Night of Navy. A quick spritz with water and ink and once dried it was ready to stamp onto. To make the dandelion I practised a few times on scrap paper, trying out different styles until I was happy with the look. I certainly didn't want to mess up at this stage after the time it took blending the background. A dash of Wink of Stella on the stamped images and a few gems for a little understated bling and it was ready to mount onto the card. So here's the finished card.


Day 2 - and much as I like the dandelion theme - there will be more another day - today is the turn of the balloons. I've used the balloons before, the last time for my daughter's 21st birthday in August, so technically I could put that on here. I'm not going to though to prove the versatility! A little watercoloured background and die cut clouds had the balloons flying high in the sky.


Day 3 - and we're back to dandelions. When I came to make this card I realised that I'd used Marina Mist for the previous two. It's funny how we tend to automatically gravitate to certain colours isn't it. Anyway, I made a conscious decision to choose something different. This time I used Pink Pirouette, Pear Pizzazz and Wisteria Wonder; not a shade of blue in sight. I also used a design sketch for my layout from Mojo Monday Sketch Challenge. Layout sketches can be great for kickstarting the flow of ideas and you can get completely different looks from the same layout. This time I used the ink resist technique.


The other 2 designs will be on the next post.