Friday, 23 December 2016

How many Xmas cards do I need??

Hello, thanks for stopping by. I can't believe on Christmas Eve I'm still making cards for the holiday season. I am really enjoying making them so I've started on my stash for 2017; how's that for forward planning? No getting caught off guard this next year for me.

This time I'm sharing a shaker card. Susan of Craftyduckydoodah showed me this easy way of making them at one of her Coffee and Card sessions. I've used mainly SU products although I confess the church stamp is one I've had for several years and is not made by Stampin Up. I chose Night of Navy and White with silver accents for a fresh look.


 I've used dies from several sets to create the bauble card so my shopping list might seem excessive this time. Those of you that know me, are aware I like to get value for money so this time, in my defence, I was trying to think outside the box. The bauble is actually just a round die with the top taken from the Delicate Ornament Thinlits. The bow is from Everyday Jar Thinlit dies although I could have used the bow as well as the sentiment fromWonderful Wreath Framelits. The Softly Falling embossing folder added some texture and just made the whole scene feel a little more Wintry


The band of Silver Glimmer Paper and die cut sentiment complete the look. Please look out for other cards based on the bauble theme; I intend to make a variety of them.




Sunday, 18 December 2016

Men Going Global

Hello, do you find it more difficult to make cards for men? I certainly do! I'm lucky in that when I first discovered SU through a Coffee and Cards group, the stamp set used that afternoon was Going Global; it was one of the first SU stamp sets I ever bought and seems such a long time ago now.


I chose to use light colours and Pool Party and Crumb Cake seemed to tick the right boxes. I teamed them up with some balsa wood, bought from my local model shop. I know that might appear to be an odd choice, but using a thin gauge balsa definitely adds to the effect and it can be coloured using the inkpads and a sponge or dauber. It cuts very easily and can even go through the Big Shot too.

I decided to use the compass from the set as the feature whilst by using the same colour ink as cardstock, the Ursa Major constellation formed a quite subtle background.


I didn't want a "fussy" card so put a band of Mint Macaron ribbon around and then wound some Linen Thread around my fingers before placing behind the compass. To complete the look I used a simple sentiment and 3 Perfect Accents, strategically placed. Did you know that the White Perfect Accents can be coloured using Promarkers? This makes them so handy to keep in stock!


Sunday, 11 December 2016

From Circles to Baubles

Hello again, Christmas is rapidly approaching isn't it. I hope preparations are well in hand, unlike mine this year. Its going to be a last minute rush again. Will I never learn.

The card I'm sharing today is made to look like a bauble, using a circle I confess, the image I coloured in is not SU, it's by Penny Black - and so like my cat, Star. I haven't put the tree up this year as she has a habit of climbing up curtains, plants etc. I can imagine I'd come home to a real Star on top of the tree each evening.


I'm not going to write a set of instructions today. There are many tutorials on You Tube for shaker cards that can be followed and indeed, several different ways of making them. I love this style of card, they look more complicated than they actually are but one piece of advice I will give is add the flakes before sealing...
 ...I'm sure you can guess what I've done in the past.!


Sunday, 4 December 2016

From the Herd for a Little Monkey

Hello, goodness hasn't this year just flown by. It seems like it was only yesterday that I was anticipating the arrival of my first grandchild, yet now I'm making her first birthday card! Emily arrived on the 7th Dec, her mum, my eldest daughter Abigail, delivered her on her own whilst her partner was downstairs watching football. I'm sure it wasn't planned that way, but you know how the best laid plans can go awry!


As soon as I saw a retired stamp set called From the Herd, I knew I had to get it. I'm not sure what it is about this set but I love it... and it can still be found on various selling sites. I have the Hardwood background stamp that goes perfectly with this set

At this point I must thank Connie Lindsey as I CASE'd her design that I found on Pinterest, tweaking it just a little to suit. Cutting out the animals is a little fiddly but well worth it in the end. I did try to isolate each animal in turn to stamp directly onto the card, however it became obvious that it would take me far longer to complete; I will need to brush up on my skills in the future.


Friday, 25 November 2016

Flower Shop


Hello, my list of cards I want to make is still rapidly growing but I thought I'd have a go at one quick one today. This was inspired by an art lesson at work where the students were using a wax resist technique. They had a great time using oil pastels to make an Xmas tree before putting a watercolour wash over it all. The results were stunning.

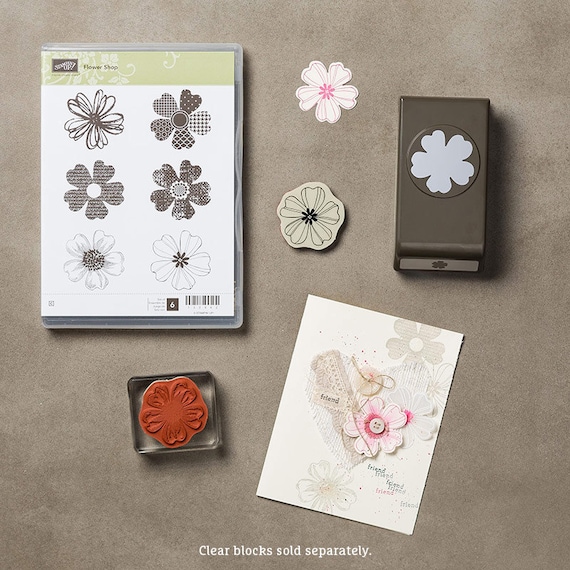
It got me thinking about how I could not actually recreate it, but get a similar effect using different media. I decided that the Flower Shop stamp set would be perfect to stamp and heat emboss with. I started by taking a piece of watercolour cardstock and stamped one of the flowers over the paper using Versamark. I then heat embossed with white emboss powder before using some of my favourite colours to produce a graduated colour wash. It had to dry thoroughly and if I'm honest, I wanted to use a heat gun to quicken the process but managed to resist and use the time for a little clearing up.

Stampin Up Flower Shop Cling mount bundle


Once dry it was mounted onto a piece of Perfect Plum card stock, then onto Whisper White before mounting onto a Pefect Plum base. A simple sentiment completed the design alongside a punched flower.


Friday, 18 November 2016

The Best Tool Ever...

Hello, I'm still working on wedding stationery so although I've lots of ideas for cards and am desperate to get cracking on them, there just don't seem to be enough hours in the day.

The one upside is that I decided to invest in a new tool to help with my stamping. Since I need to stamp in the same place on each invitation, RSVP etc I chose to buy a stamping press.


It's amazing...
...stamping was never my forte, it's always been a bit hit and miss but so far with this tool I've got some great results. This really is the best thing I've found since discovering Stampin' Up.

It has a ruler in both inches and centimetres along 2 sides so although the press is 7" square, you can use larger sheets of paper and card. The hinge self adjusts according to the thickness of the stamp being used and the base of the press has a grid which helps to keep cardstock in place.


Friday, 4 November 2016

Where's Rudolph?

Hello, I've been rather tardy about putting up recent makes. To be quite honest, there haven't really been many makes as I'm still part way through a Wedding stationery order.

Anyway, the other week at Coffee and Cards we made a great little Christmas card using the reindeer stamp from the Cookie Cutter bundle with a hat and scarf to keep him warm from Jolly Friends.

Susan had originally designed it in shades of brown to make suitable for a man. I don't know about you, but I find it quite difficult to come up with male oriented cards at times. When she showed me the card I instantly thought I'd like to make it in Blushing Bride, a lovely delicate pink, for my grandaughter who will have just turned one in December.


We used the Cable Knit Dynamic Textured Impressions Embossing Folder which gives a deeper and more detailed design. The cable pattern fitted so well with the theme that I couldn't resist using it on the envelope too.